DAY 1
As the students walk in and sit down there will be some cartoons playing. This will lead into a discussion of what power is and how the media correlates with power. They will also address how the power of the media portrays gender roles. We will encourage students to discuss their beliefs of what gender roles are. After a brief class intro and discussion we will begin to look at power as a big idea in art making. What power means to the students and what power means in general. Afterwards, we will show how the contemporary artist Ghada Amer explores power in her art making. We will then show the Power website that we created to briefly explore all sides of power. We will end the discussion by having a short critique and critical analysis, focusing on Ghada Amer’s Snow White Without the Dwarves a mixed media work. We will again discuss how gender roles are portrayed in that piece.
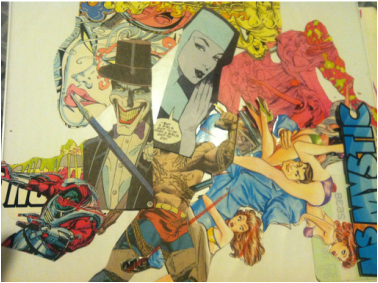
After the discussion is over we will begin a demo on canvas that incorporates paint and collage. We will a selection of images from magazines and other media sources. We will demo to students how to cut out with both scissors and using exacto knives to gain more detail and precision. We will also have list of pre selected text that we will display along with all other necessary materials. Before painting begins we will lay out scrap paper to cover the table surfaces and explain that this is essential to make cleanup easy and protect the table tops. We will begin painting by showing the recommended amount of acrylic paint needed, showing methods of mixing the paint and proper use of the paint brushes. Tips on how to make even brush strokes and also methods of adding texture will be included. During the demo there will be an emphasis on explaining to students that it will take time for the paint to dry so its crucial to be done painting by the end of the second day of the lesson (students first work day). Ending with a short explanation of how to properly clean brushes with mild soap and warm water.
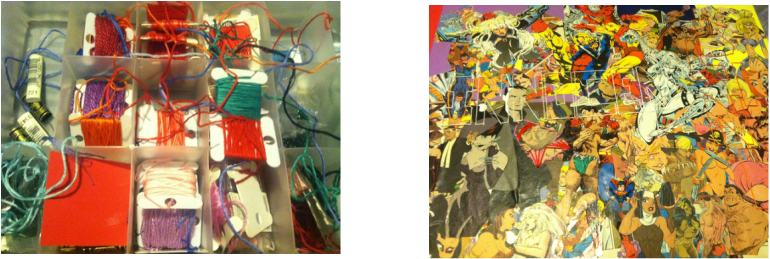
For the remainder of class the students will be cutting out images and making a list of text from magazines, comic books, newspapers etc. that they will like to incorporate in their final piece as well as making a choice between working on canvas or wood board. If questions of image selections arise we will inform students that it is their choice how they would like to cut out the images, and that their choices should reflect their intended representation of power and gender issues. After their selection of canvas has been made, students must write their name on their board or canvas with a sharpie marker and store them in their designated class section so they are able to begin work immediately on day 2 (First work day).
By the end of the day students will have the rubric, and know the expectations of the project.
Students should have started cutting out and collecting images and text for their final project. They must have selected and put their names on their canvas and put them away in their proper place. All materials and scrap paper should be cleaned up in an efficient and timely manner.


DAY 2
FIRST WORK DAY:
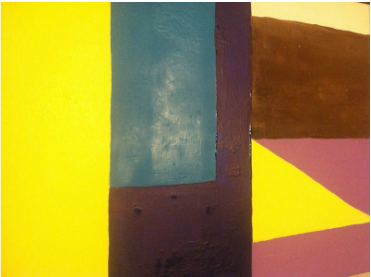
Students will arrive to class and immediately begin working on painting their selected canvas. They may select any color acrylic paint that they believe will work cohesively with their design. Student need to gather paint, water cups, and a paint brush. Students should cover their work surface like demonstrated with scrap paper that can be easily and quickly thrown away at the end of class to speed up and increase efficiency of clean up procedures. We will be walking around throughout this time to keep students on task and answer questions on application of paint and brush techniques.
When and if painting is completed early students should use the remainder of their time to continue working on cutting out and collecting images and text. Students that have difficulty or fear of using the exact o knives they will be encouraged to use scissors. As they cut out the images students should begin mapping out where they would like their images to be arranged on their canvas. This initial organization will help make a more visually appealing and cohesive collage. Students must also have text selected that they will include on their final design, either written in string or painted or both.
By the end of day 2 students must have all painting completed on their project to allow enough time for their canvas to dry. Canvases that are still wet should be placed on trying racks to insure that nothing will mess up their paint or stick to the surface. Students should also have gathered most of the images and text they will use. During clean up we will monitor students while washing brushes to be sure that they are properly caring for the brushes and getting all of the paint out, as well as checking to insure that the caps are put back on the paint tubes. We will also check to be sure that all scissors and exacto knives are returned.
FIRST WORK DAY:
Students will arrive to class and immediately begin working on painting their selected canvas. They may select any color acrylic paint that they believe will work cohesively with their design. Student need to gather paint, water cups, and a paint brush. Students should cover their work surface like demonstrated with scrap paper that can be easily and quickly thrown away at the end of class to speed up and increase efficiency of clean up procedures. We will be walking around throughout this time to keep students on task and answer questions on application of paint and brush techniques.
When and if painting is completed early students should use the remainder of their time to continue working on cutting out and collecting images and text. Students that have difficulty or fear of using the exact o knives they will be encouraged to use scissors. As they cut out the images students should begin mapping out where they would like their images to be arranged on their canvas. This initial organization will help make a more visually appealing and cohesive collage. Students must also have text selected that they will include on their final design, either written in string or painted or both.
By the end of day 2 students must have all painting completed on their project to allow enough time for their canvas to dry. Canvases that are still wet should be placed on trying racks to insure that nothing will mess up their paint or stick to the surface. Students should also have gathered most of the images and text they will use. During clean up we will monitor students while washing brushes to be sure that they are properly caring for the brushes and getting all of the paint out, as well as checking to insure that the caps are put back on the paint tubes. We will also check to be sure that all scissors and exacto knives are returned.


DAY 3
DEMO/WORK DAY:
As students walk in, they will sit around one table as we will have a demo to begin class. We will start by showing them the proper way to glue down images. Explaining to students that the back of the image must be covered in glue and then a layer of glue must be brushed over the top of the image to insure that it will stick and the edges will not peel off of the canvas. Exceptions may be made on the style of image application if the student can explain the significance of their aesthetic choices and the relevance to their project.
The demo will continue with an explanation of embroidery and how to apply thread to their canvas. Starting with laying out the pattern, or text they will apply string to and drawing it out on the canvas with a pencil. We will than show students how to embroider it traditionally with a needle, sewing the thread directly into the canvas or gluing it down, the students will choose the method they prefer or combine both methods if they have chosen a canvas. Students should utilize multiple colors to create pattern and texture on the canvas
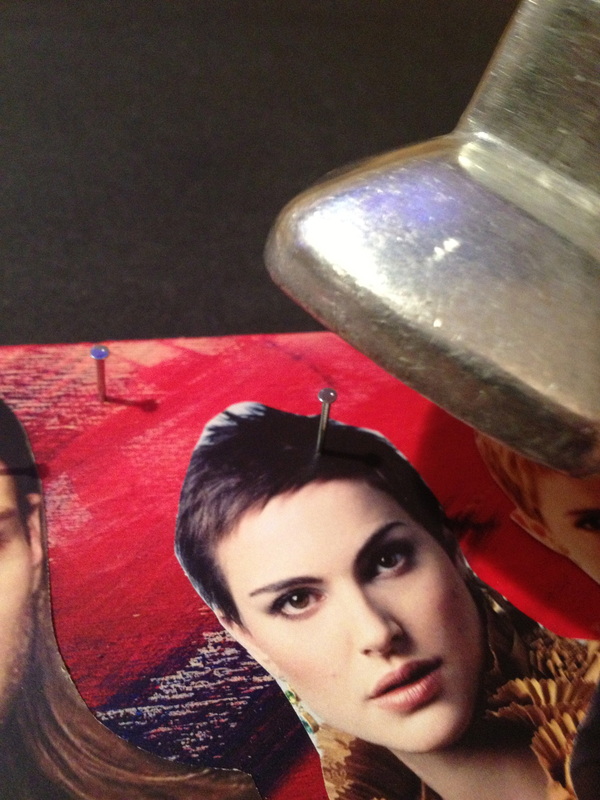
For those students who have chosen a wooden board, we will also be showing how to use nails and a hammer to apply the string. For this technique students must draw out their design. or text and hammer nails along the line positioning nails closer together to get soft flowing lines. Less nails are necessary for hard geometric lines. During this demo we will be encouraging students to be mindful of their fingers while using the hammer and nails. After the nails have been hammered into the board we will demonstrate how to wrap and pattern the string around the nails, utilizing multiple colors and overlapping them to create pattern and texture. The demo will take at least half of the class, if questions or concerns arise than we will address them accordingly.
After the demo the students will begin to glue their images.
For clean up students must be sure to wash brushes thoroughly to be sure they have removed all paint from the bristles. Scrap paper should be thrown away and tables should be wiped down. Canvases that are still tacky should be put on drying racks to be stored.
By the end of day 3 students should have started gluing their images on their canvas and begin choosing the colors of thread they would like to use so they will be able to move forward in the coming work days.
DEMO/WORK DAY:
As students walk in, they will sit around one table as we will have a demo to begin class. We will start by showing them the proper way to glue down images. Explaining to students that the back of the image must be covered in glue and then a layer of glue must be brushed over the top of the image to insure that it will stick and the edges will not peel off of the canvas. Exceptions may be made on the style of image application if the student can explain the significance of their aesthetic choices and the relevance to their project.
The demo will continue with an explanation of embroidery and how to apply thread to their canvas. Starting with laying out the pattern, or text they will apply string to and drawing it out on the canvas with a pencil. We will than show students how to embroider it traditionally with a needle, sewing the thread directly into the canvas or gluing it down, the students will choose the method they prefer or combine both methods if they have chosen a canvas. Students should utilize multiple colors to create pattern and texture on the canvas
For those students who have chosen a wooden board, we will also be showing how to use nails and a hammer to apply the string. For this technique students must draw out their design. or text and hammer nails along the line positioning nails closer together to get soft flowing lines. Less nails are necessary for hard geometric lines. During this demo we will be encouraging students to be mindful of their fingers while using the hammer and nails. After the nails have been hammered into the board we will demonstrate how to wrap and pattern the string around the nails, utilizing multiple colors and overlapping them to create pattern and texture. The demo will take at least half of the class, if questions or concerns arise than we will address them accordingly.
After the demo the students will begin to glue their images.
For clean up students must be sure to wash brushes thoroughly to be sure they have removed all paint from the bristles. Scrap paper should be thrown away and tables should be wiped down. Canvases that are still tacky should be put on drying racks to be stored.
By the end of day 3 students should have started gluing their images on their canvas and begin choosing the colors of thread they would like to use so they will be able to move forward in the coming work days.


DAY 4
CONTINUED WORK DAY:
This day will be a full work day students should evaluate the progress of their works at the start of this class. Being sure that they are on track with their work sheets and that they are meeting the expectations of the rubric. We will be walking around providing one on one help and answering any questions students may have about image application. When they feel their layering of images is adequate they may progress to embroidery, or applying their nails depending on their choice of canvas.
By the end of day 4 students should be finished gluing down their images to their canvas and some may have begin working on embroidery.
Student should remain mindful of clean up procedures.

DAY 5
CONTINUED WORK DAY:
At this point some students may have begun embroidery and they should continue working and all other students should begin. We will continue to walk around and help students one on one.
At the end of day 5 students will have a small partner critique. Students will use sticky notes to make at least 2 helpful suggestions to improve their partners work. This should only take the last 5 min. of class. Suggestions should be thoughtful and critical to help improve the effectiveness and strength of the big idea of their partners work. Students should have most embroidery done on their project by the end of class

DAY 6
LAST WORK DAY:
Students should have most of their embroidery finished at the start of class. They should consider the suggestions left on their work by their partner in the previous days short critique. Students must keep these notes for the final critique. They will need to be able to explain the suggestion, and why they did or did not embrace the suggestions. This entire day will be devoted to the completion of embroidery and any finishing touches the students would like to add like additional layers of paint etc.

DAY 7
CRITIQUE DAY!
All works need to be completed prior to the start of class. Today will be devoted to a full critique of student works.
CRITIQUE DAY!
All works need to be completed prior to the start of class. Today will be devoted to a full critique of student works.
